Proper Use of Your New Vampire Fangs

When you put the fangs on they’ll likely stay on quite well while making normal movements with your mouth like smiling and talking.  If you find that they don’t stay on very well at all, examine the fit.  If you goofed up anywhere along the way (distorted impression, defects in model, distorted acrylic, etc.), that may be your problem.  Refer to our Troubleshooting page for more tips.

If the teeth fit pretty well, but just don’t stay on as well as you’d like, it might be that your teeth have a shape that is not too favorable.  If this is the case, you can try some type of fixative.  Try putting toothpaste in the fang and see if it helps.  You could also try some temporary dental cement.  Both these items can be found in the dental or pharmacy section of most stores.

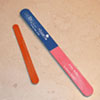
In the above picture we’ve used temporary dental cement to fix our fangs in place.  You’ll notice that the cement gave the teeth a white, opaque appearance and that it’s not seating completely.  To prevent this, only put the cement on the back side of the tooth and keep it pretty minimal.

Lingual view of bulk.

Facial view of bulk.

If you decided to add a little bulk to the back side of those teeth they should now look like the above pictures.  This is our preferred way to ensure a great fit.  If you didn’t add this material a few steps back (step 3) you can still do it now.  Acrylic is actually very good at bonding to itself.  Put some vaseline all over the teeth neighboring your fangs on your model, stick your fangs back on it, mix up some new acrylic, and add it to the back side of your fangs and the teeth next to them.  After it has set up, remove the fangs, check that the new material is firmly attached to the old material, and polish things up.

When you’re all done, stick your fangs on, find a friend or small child to scare, and give them your best vampire hiss.  You’ve successfully created your custom set of vampire teeth!  Keep your models for future use.  You’ll be able to replace your fangs more easily when needed or you can make a new variation of fangs.

READ THE FOLLOWING PARAGRAPH!  THIS IS VERY IMPORTANT!

No matter how well your teeth stay on, show some caution while wearing them.  For example, if someone tells a joke at your next vampire convention, it wouldn’t be wise to laugh out loud with your head thrown back.  A fang could easily slip right down your trachea and an emergency department is going to have a difficult time locating an acrylic fang deep in your lungs.  Do not eat with your fangs, do not sleep with your fangs, etc. Do not wear your fangs for extended periods of time either. Your bite is going to be slightly out of place with these fangs on and it may begin to irritate your teeth and cause some sensitivity or aching. Also, if you wear your teeth for multiple hours per day for extended lengths of time you may begin to see movement or drifting of your teeth!  Most of all, withstand the temptation to bite the neck of a member of the opposite sex.  These teeth are very strong and can easily puncture skin if you’ve sharpened them.  We hate to break it to you, but vampires are still considered a myth!  No matter how cool you feel wearing these puppies, you will not acquire any vampire abilities by wearing them!!

NEXT


Step 6: Polishing

When you remove your fangs, you’ll likely find that you’ve got a whole lot of cleaning up to do.  Check for any major repairs like voids or distortions.  Our Troubleshooting page has methods for fixing any blaring errors you see.  Skip ahead here if you need to.  If everthing looks pretty good, you can begin polishing.  Any excess acrylic can be removed very quickly with a power rotary tool commonly called a Dremel (Dremel is actually the most popular brand of rotary tools).  Focus on the visible side of your teeth.  If you want to trim off the acrylic on the back side later, you certainly can, but you might find that extra acrylic helps to keep your fangs in place.

.

We got this Black & Decker rotary tool at Walmart for around $30.  You might need to pick up a bur and a corresponding collet if a useful one doesn’t come in your kit.  You could use either a bur like the one shown in the picture above for a good result.  Dremel’s can be a very useful tool for dozens of other projects, so if you’ve thought of buying one this might be the perfect opportunity.

The other way to trim up your teeth is with an emery board – after all, this is nail acrylic.  Chip off any large pieces and then start refining your teeth until they look just the way you want them.  Keep a mirror handy so you can try them on your teeth to evaluate the final result.  Once you’re done, polish them up with the finest surface of your emery board.

The polishing step may take a while depending on the tools you have handy and how much you need to trim your teeth.  Have a little patience until you’re happy with the finished product!

NEXT


Step 5: Creating Your Fangs


Next, remove the clay fangs from your teeth which will return the model to its original form.  You’re going to stick this model into the impression you just took of the model with fangs.  If you think about it, there should be a space between your teeth and the impression material (where your sculpted fangs were).  We’re going to pour acrylic into the impression and then place the model in after it.  Once the acrylic sets up, you’ll pull it out, take the new acrylic teeth off the model, and you magically have vampire fangs!

First though, take some Vaseline (also known as petroleum jelly or petrolatum jelly) and smear a thin layer on your model.  Use a Q-tip to make sure the Vaseline isn’t forming globs in the little nooks and crannies around your teeth.  This lubrication will make sure your soon-to-be acrylic fangs can be easily removed from the model.

Next comes the acrylic.  We’ve got to mix enough acrylic powder (polymer) with acrylic liquid (monomer) so that the acrylic will set up correctly, but it needs to be runny enough to flow into the impression (similar to the stone mixture).  Read the instructions that came with your acrylic of course and then mix it however you feel comfortable.

Our preferred method is to pour a little liquid into a mixing cup first.  Make sure this is a disposable cup and that it does not melt away when it comes in contact with the acrylic (we used the bottom of a water bottle).  Then add a little bit of powder at a time.  Mix that powder in (with a disposable mixing stick!) and check the consistency of your mixture.

When you lift the stick from the mixture you’ll want a string of acrylic to drag upwards about an inch before dropping back into the bowl.  If its thicker than this, add some more liquid.  If it’s too runny, add some more powder.  We start with the liquid because we find the powder a little easier to control.  You’ll definitely want to experiment with the acrylic before making a final go at your fangs.  Try to achieve the correct consistency and pay attention to how long you have to work with the material before it sets up.

A definite sign that the material is hardening correctly is the temperature.  Most acrylics set up by an exothermic reaction which means that it becomes very warm to the touch.  Some materials become so warm that they would burn your mouth were you to apply the acrylic directly to your teeth, not to mention the fact that you’d probably have a big chunk of acrylic locked onto your teeth by the time you were done.

.

When you’re ready, pour enough acrylic into your impression to fill the teeth that will have fangs.  Just like the stone, make sure it runs slowly into the deepest parts of your impression without trapping any air bubbles that will leave voids.  Now stick your un-modified and lubricated model into the impression and make sure its seated fully.  Watch the leftover acrylic in your mixing bowl to gauge how completely setup your fangs are.


You may want to removed the fangs when the teeth are a little rubbery.  It will make separation of the fangs from the model a little easier.  Also, your teeth might have some undercuts that will make it impossible to remove if the acrylic hardens completely, unless you were to grind out the model – not fun.  Check out the diagram above.  With no undercuts (A), the fangs come off easily.  With undercuts (B), the fangs will become locked.  Most canines are shaped in a way that you won’t have a big problem with this, but you’ll want to closely examine your own teeth’s anatomy just to be safe.

NEXT


Step 4: Impressing Your Model

Now that you have the  model of your teeth looking pretty vampirish it’s time for yet another impression!  We’re going to take an impression of your  model (for reasons we’ll explain later), but there is one important step at this point.  Get a bowl of soapy water (dish soap would work best) and gently place your cast and molded fangs into it.  Let it sit for at least 10 minutes.  This will enable you to take an impression of the model without the impression material sticking to the cast.  Don’t forget this step!

.

Next mix up the impression material just like we did before, put some in your custom tray again, and very carefully stick your model into the goop.  Let it set up and remove the model.  The impression material should be thin enough that it won’t smoosh your fangs as you carefully press it into the tray.  Don’t push it all the way through the impression material or the tray will definitely do some smooshing.

You may have sculpted a much more intricate and fragile design with your teeth.  If the impression mashes your sculpted teeth you might want to consider baking the model.  One great feature of Sculpey clay is that it can be hardened with a quick trip to the overn.  The only drawback to this is that you won’t be able to remove the fangs from the model, which you’ll need to do later.  If you have a second model of your teeth this won’t be a problem.

Examine your impression once again.  Make sure you have a very detailed impression around your fangs.  If you used a plastic custom tray, make sure there are no voids that expose the tray.  In the last step you’ll use acrylic to make your fangs and if the acrylic comes in contact with the tray it will fuse to the tray and likely ruin all your hard work.

NEXT


Step 3: Sculpting Your Vampire Teeth


This is where things start to really get fun.  We’re now going to sculpt our horrifying vampire fangs.  Take some Sculpey clay and begin applying it to the teeth you’d like to cover with your fangs.  The clay will stick much more easily if you’ve allowed it to dry thoroughly.

You may need to use some kind of small instrument to help you sculpt your teeth.  Here I’m using a small tool found in a manicure kit.  I think its actually used for cleaning out your ears – gross, but very useful in this situation.

.

Gently sculpt the clay until you have two fangs that look like the vampire fangs you’ve always wished you had.  Cover the front and back of the teeth. If you can’t get it just right, that’s ok, because we’re going to trim the teeth down to size later on.  If anything, bulk the teeth out a bit.  Later on, you can simply take away extra material, but it’s much more difficult to add material.  Also, keep in mind that if the material is extremely thin you will have a much more fragile set of fangs.

An alternative option is to use oil-based modeling clay, another very common clay.  Oil-based clay is very easy to mold and shape and it won’t dry out.  It’s an excellent option if you can’t get your hands on any Sculpey.  We liked the Sculpey because it’s a little more firm than the modeling clay which you’ll see can be helpful in a future step.

Bulking out the lingual.

There is one other very useful feature you may want to include in your fangs at this point.  You’ll notice in the above picture we’ve added a little more bulk to the back side of the teeth.  This extra material will wrap around the neighboring teeth and provide a little more retention for your fangs.  It means having a bit more material in your mouth, but it won’t be visible to your admirers and it really does wonders for keeping those teeth in place.

NEXT


Step 2: The Dental Model

Before pouring stone, make sure any water or saliva pooling in the impression has been shaken out.  Don’t dry out your impression material, but make sure there are no films of water on the impression surface.  Sometimes we use a bottle of canned air to help blast any left over liquid out of there.

Make sure you’ve read over the instructions of your own particular casting material.  Hopefully you’ve experimented with it a bit beforehand.  In most cases, you’ll find that you need to add much less water to the stone than you did with the impression material.  The product we used suggested one part water to three parts powder.  Whatever the suggestion, you’ll want your mixture to be just runny enough that you can flow it down into your impression.  Too runny and you’ll get a real soft and chalky model.  Too thick and the material won’t reach the cusp tips of your teeth in the impression and you’ll end up with voids.  Usually, you’ve got plenty of time to mix and pour the stone, but of course, read the product’s instructions to be sure.

When you pour the stone into the impression of your teeth, start near the furthest back tooth.  Tilt your impression so the stone runs into one tooth at a time.  Watch to make sure it runs all the way to the bottom of the impression as it works its way from tooth to tooth.  As we’ve mentioned already, if the mixture is too thick or if you plop a big glob of stone onto the impression material all at once, air bubbles will get caught in the deepest parts and leave voids in your model.  It helps to tap the impression on the countertop and force the stone down into the impression.  In the photos from a dental office that we showed earlier, you might have noticed a little contraption on the counter.  That’s a vibrating device that helps the stone flow better when the impression is placed on it.  Do whatever you gotta do to get that stone in place properly.

Prop your impression on a flat surface and let it sit for the designated amount of time – usually about 30 minutes to an hour.  After the stone is set enough that it won’t run all over the place, we usually flip it over so that the stone is resting on the countertop (stone can be tricky to clean up so be careful about which type of countertop you’re using – use a large ceramic tile if you’ve got one handy).  This will give your model a nice flat underside and make it much easier to work with later.

.


After the stone has set, gently remove the model and see how you did.  You should have a beautiful set of teeth in your hand with a very detailed replication of your canines in particular.  Make sure there are no major voids on those teeth and that the gum line is well defined.  Note the blobs of stone marked on the above picture. These were caused by bubbles in the impression.  If you’re not in a hurry, you might want to let your model sit until all the moisture has dried out which can take another hour or two.  You can also blast it with a hair dryer if you need to move a little more quickly.  Your cast will be extra hard once dried and easier to handle without damaging.

NEXT


Step 1: Impressing Your Teeth

First you’ll need a tray to put your impression material in.  Don’t forget, the alginate is a little runny.  If you were just to stick it in your mouth it would be like trying to get a thick milk shake to cooperate.  What’s more, you’ve got to hold very still once the material is placed in your mouth until it sets up.  A lot of movement will cause distortions which will lead to an inaccurate model of your teeth so we need something to hold the goopy stuff in place – a tray!

One way to make this is with a paper cup.  Cut out a bottom section of the cup as seen here.  The goal is to completely engulf your teeth in impression material so we want this tray to guide the material up around your teeth and onto your gums.  Try the tray in to make sure it will fully cover all surfaces of your front teeth from canine to canine.


You can make your vampire teeth to cover whichever teeth you want, but some elongated canines tend to be the most vampire-ish.  Here’s a diagram of your front teeth if you’re not sure which are your canines.  If you’re still unsure what we’re trying to accomplish here, scroll down and check out some of the photos of the final impression.

If you want to go that extra mile we have another method for making a tray that will fit your mouth perfectly, help you use up less impression material, and provide a more rigid support for your impression.  First take some Play-Doh or something similar (click here for a homemade Play-Doh recipe).  Shape it into an arch or half circle as seen above.  You want the shape to closely resemble the U-shape that your upper teeth make.  You can even hold the Play-Doh in your mouth for a moment to see if you’ve got it right.  Be warned though, unless you were one of those weird kids that licked glue and munched on Play-Doh, don’t taste it, yack!

Next you’ll need a pot of boiling water.  Take some Friendly Plastic (a really cool plastic material found at most craft stores, see our supplies list) and submerge it in the hot water with some tongs.  Hold it lightly because once it warms up, it might stick to whatever it touches.  As soon as it becomes malleable, remove it from the pot and quickly take it to your Play-Do arch.

Mold it to fit your Play-Doh as you see in the picture.  Make sure there are no sharp points that might jab your gums.  You’ll have to move fairly fast to make this work and it may require a brief dip in the boiling water again to get it just right.  Let it sit for a few minutes until it hardens up again.  Run it under cold water to speed things up.  If you really fowl it up, just throw it back in the boiling water and warm it up again.  It really is “friendly” plastic.

.

Once you’ve got it just right, try it in your mouth and see if it envelopes your front teeth completely.  You now have a custom-fit tray!

Now for the impression.  Read the instructions that come with your impression material and follow the measurement guidelines.  In most cases it’s a 1:1 ratio meaning you can mix a scoop of powder with an equal amount of water.  One quick way to do this is to fill your custom tray with water and then pour the water into your mixing bowl.  Mark the spot that the water comes to in the bowl, dump the water into a separate cup, and fill the bowl to that mark with powder.  Dump the water back in and mix vigorously.

Keep some extra water nearby or stay near a sink because you might need some more water if things are turning out too thick.  After mixing it thoroughly you’ll want a nice creamy, clump-free mixture, sort of like a bowl of pudding – a nice smooth mix that’s thick enough it wouldn’t run all over the place if you dumped it out.  This stuff cleans up pretty easily so don’t worry about ruining any kitchen instruments.

Transfer this to your custom tray and insert it in your mouth.  Doesn’t it look tasty?!  You should feel it fill all the spaces around your front teeth and up past your gum line.  Remember, you only have a minute or two to do this before it starts to set up.  Hold really still for three or four minutes while the material hardens and try to think happy thoughts.

Once set, you can gently remove it from your mouth to assess how you did.  Look for any imperfections like voids or blurred details.  For example, you’d want to see a very crisp line where your gums meet your teeth, particularly around the canines (or the teeth you’re planning to turn into fangs).  When you pour in the casting material these voids will fill up and appear as bubbles or globs of stone on the model.  An adequate impression will look like the picture shown.  If not, tear out the bad impression and have another go at it.  Trust us, there is plenty of incentive to get it right the first time!  Really though, it’s not as gross as it looks so just buck up and do it again if needed.

Now, if you got your impression material from a hobby store it might tell you to wrap the impression in a wet paper towel, stick it in a plastic bag, and store it in the fridge for up to ten days or so.  It’s true that alginate-like materials will hold up under proper storing conditions for several days, but most of these products assume that you’re taking impressions of random objects or other body parts (like your child’s foot).  A little distortion from storing the impression for a few days is not a big deal, but our goal is to make a mean set of fangs that very accurately fit your own teeth so pour some stone into that baby immediately!  Dentists make sure to use their impressions within ten minutes in order to get a highly accurate model so you should probably do the same.

You’re done with the impression step!

NEXT


Overview: How Your Dentist Would Make Fangs

The first step on your way to “Dracularization” is to make a replica of your teeth.  It’s called a dental model or cast (see above).   It will be much easier to create fangs custom-fit to your mouth if you can actually hold your teeth in your hands and sculpt the fangs just the way you want them.

We’ll make this model by first creating an impression or negative mold of your teeth which we will then fill with a casting material to give us the positive model we’re wanting.

Your dentist does this kind of thing all the time and you’ve likely seen these models sitting around his or her office.  You may have had your own impression taken and models made when you had your teeth whitened, braces put on, a crown made for your tooth, etc. Trust us, this is such a delightful experience you’d have a hard time forgetting it!

A dentist typically uses a material called alginate (the impression material).  It comes as a powder to which water is added creating a big bowl of slimey goop.  While it’s still a little runny, the goopy material is slapped into a tray with a spatula and then inserted into your mouth engulfing your teeth.  (Check out those rockin’ Batman glasses on the last picture – how fitting!)

In about three minutes time, the goop sets up and becomes a gelatinous material.  It’s still a little flexible but retains its shape very well.  This is important if you want to remove the impression from your mouth without damaging it.

.

The dentist will then fill the impression with dental stone.  This is another powder and water mixture.

The stone sets up in about a half hour’s time and is hard as a rock (that’s why it’s called stone!).  The new dental model is removed from the alginate impression and voila!

A gorgeous set of teeth is staring right back at you!

So, let’s list off the materials a dentist would use.  We mentioned a tray, alginate impression material, a mixing bowl and spatula, and dental stone.  Dentists have special access to these types of materials, but believe it or not, so do you!  In case you’ve forgotten, we’ve listed stores and websites where you can purchase similar materials on our supplies page.

Now let’s get to the good stuff!

NEXT


Supplies

Before we get into the supplies you’ll need, let’s get a few things straight. First of all, there is a learning curve if you’ve never done anything like this before. You’ll learn some new terminology (new or important terms are hilighted in bold) and deal with some unique materials. It may be an entirely new experience so the key to doing this right is in taking your time. Read through the instructions as many times as it takes to fully understand the process and spend some time experimenting with the materials that we’ll be showing you. You’ll be sporting some serious vampire fangs before you know it!

This would be a great place to throw in a disclaimer as well. Use these instructions at your own risk! We will provide plenty of guidelines and instruction on the proper fabrication of vampire teeth as it pertains to your safety and well-being. That being said, if you are unsure about any of the material presented here, please find another method of obtaining your own vampire fangs. We also have a Terms of Use page that we expect all of our users to review and fully understand.

Now, let’s get started! You’ll need some unique supplies on your vampire journey. Here we’ve posted all the supplies we used that are not commonly found at home.  We’ve listed the brick and mortar store where we found the item as well as an internet website where these items can be found.  Alternative materials are suggested for some products as well. The other supplies you may need will be introduced throughout our instructions.

Depending on what kind of stores are at your fingertips, you may or may not have access to the same products that we do, but keep in mind there are numerous materials that will get the job done.  We’ve done our best to describe each item in a way that you’ll be able to find equivalent items without difficulty.  If you are limited by the kinds of stores in your own area, just follow the internet links.  Please contact us if you find a link that is broken.

.
Item Description In stores: Online:
IMPRESSION MATERIALS

Activa InstaMold

The material we used to take an impression or negative mold of our teeth.  Dentists use a similar material called alginate that is derived from seaweed.  Be sure to use a product that is labeled as safe for use with your body. Hobby Lobby CreateForLess
K12SchoolSupplies

3D Gel

Similar to Instamold, but much less quantity. Hobby Lobby Hobby Lobby
CASTING MATERIALS

Activa PermaStone

The casting material we poured into our impression to make a stone model of our teeth.  This is the sister product to InstaMold. Hobby Lobby ACE Art Supplies
SCULPTING MATERIALS

Sculpey III

Sculpey is a polymer clay that can be easily molded and then hardened by placing it in the oven.  Its a little more firm than oil-based clay which made it ideal for our use.  This is a 2 oz. block. Hobby Lobby Amazon
Blick Art Materials

Vab Aken Modeling Clay

Oil-based modeling clay is very easy to manipulate and doesn’t dry out.  Not as firm as the Sculpey but still a good option.  This is 1 lb. Hobby Lobby Blick Art Materials
Kit Kraft
ACRYLIC MATERIALS

Beauty Secrets Nail Acrylic

Nail acrylic comes as a powder and liquid.  Be mindful of the powder’s color.  Acrylic typically comes in white, clear, and pink.  We used “natural” color. Sally Beauty Sally Beauty
Beauty Secrets
MISCELLANEOUS MATERIALS

Play-Doh

Play-Doh comes in handy if you want to make a sturdy tray for the impression of your teeth.  You could use any other kind of clay, but if you have some Play-Doh handy it seems to work best. You can find many homemade recipes with a quick internet search. Walmart Amazon

Friendly Plastic

Another material handy for making a custom-fit tray.  Pretty cool stuff and very cheap. Hobby Lobby Hobby Lobby
Create For Less
Sunshine Crafts

Rotary Tool

A rotary tool is commonly called a “Dremel” after the popular brand.  We purchased a Black & Decker rotary tool that was much cheaper and works extremely well.  A great tool for all kinds of crafts.  You may need to purchase extra collets and burs to trim your fangs up just right. Walmart Amazon

Emery Board

An emery board can help you get an extra fine polish on your fangs.  It can also replace the rotary tool if you don’t mind working a little harder to shape and polish your teeth. Walmart
Walgreens
Amazon

Temporary Dental Cement

Temporary dental cement is readily available at most drug stores.  It can come in handy if you really need to make sure those fangs stay put.  We highly recommend this as a safety measure even for the best-fitting fangs. Walmart
Walgreens
Walgreens

NEXT

  • Supplies
  • Overview: How Your Dentist Would Make Fangs
  • Step 1: Impressing Your Teeth
  • Step 2: The Dental Model
  • Step 3: Sculpting Your Vampire Teeth
  • Step 4: Impressing Your Model
  • Step 5: Creating Your Fangs
  • Step 6: Polishing
  • Proper Use Of Your New Vampire Fangs
  • Troubleshooting