Step 5: Creating Your Fangs
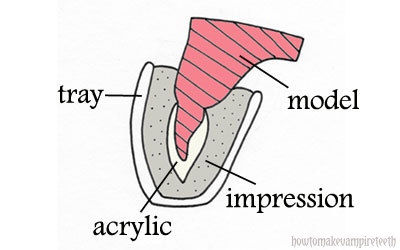
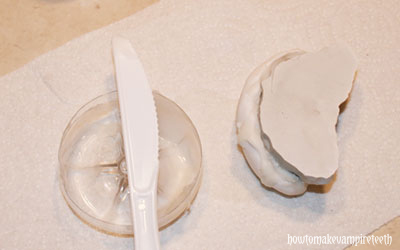
Next, remove the clay fangs from your teeth which will return the model to its original form. You’re going to stick this model into the impression you just took of the model with fangs. If you think about it, there should be a space between your teeth and the impression material (where your sculpted fangs were). We’re going to pour acrylic into the impression and then place the model in after it. Once the acrylic sets up, you’ll pull it out, take the new acrylic teeth off the model, and you magically have vampire fangs!
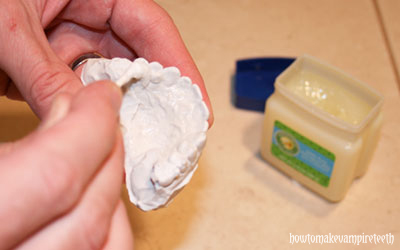
First though, take some Vaseline (also known as petroleum jelly or petrolatum jelly) and smear a thin layer on your model. Use a Q-tip to make sure the Vaseline isn’t forming globs in the little nooks and crannies around your teeth. This lubrication will make sure your soon-to-be acrylic fangs can be easily removed from the model.
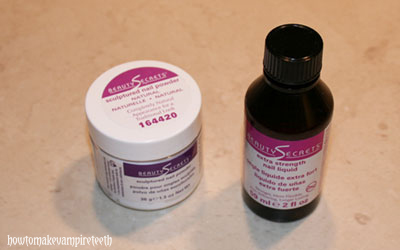
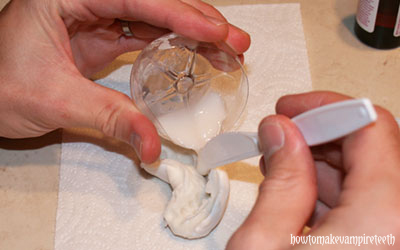
Next comes the acrylic. We’ve got to mix enough acrylic powder (polymer) with acrylic liquid (monomer) so that the acrylic will set up correctly, but it needs to be runny enough to flow into the impression (similar to the stone mixture). Read the instructions that came with your acrylic of course and then mix it however you feel comfortable.
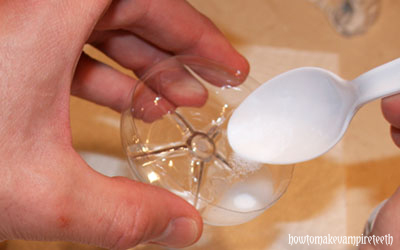
Our preferred method is to pour a little liquid into a mixing cup first.  Make sure this is a disposable cup and that it does not melt away when it comes in contact with the acrylic (we used the bottom of a water bottle).  Then add a little bit of powder at a time. Mix that powder in (with a disposable mixing stick!) and check the consistency of your mixture.
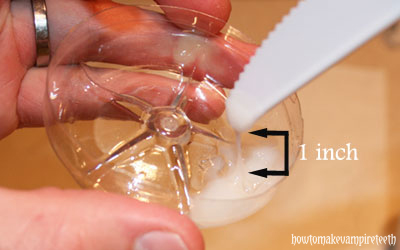
When you lift the stick from the mixture you’ll want a string of acrylic to drag upwards about an inch before dropping back into the bowl. If its thicker than this, add some more liquid. If it’s too runny, add some more powder. We start with the liquid because we find the powder a little easier to control. You’ll definitely want to experiment with the acrylic before making a final go at your fangs. Try to achieve the correct consistency and pay attention to how long you have to work with the material before it sets up.
A definite sign that the material is hardening correctly is the temperature. Most acrylics set up by an exothermic reaction which means that it becomes very warm to the touch. Some materials become so warm that they would burn your mouth were you to apply the acrylic directly to your teeth, not to mention the fact that you’d probably have a big chunk of acrylic locked onto your teeth by the time you were done.
When you’re ready, pour enough acrylic into your impression to fill the teeth that will have fangs. Just like the stone, make sure it runs slowly into the deepest parts of your impression without trapping any air bubbles that will leave voids. Now stick your un-modified and lubricated model into the impression and make sure its seated fully. Watch the leftover acrylic in your mixing bowl to gauge how completely setup your fangs are.
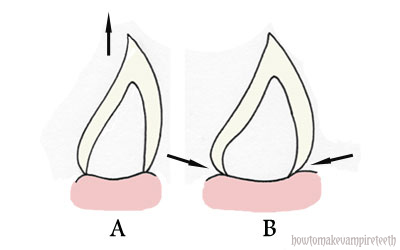
You may want to removed the fangs when the teeth are a little rubbery. It will make separation of the fangs from the model a little easier. Also, your teeth might have some undercuts that will make it impossible to remove if the acrylic hardens completely, unless you were to grind out the model – not fun. Check out the diagram above.  With no undercuts (A), the fangs come off easily. With undercuts (B), the fangs will become locked. Most canines are shaped in a way that you won’t have a big problem with this, but you’ll want to closely examine your own teeth’s anatomy just to be safe.
